MOUNTAIN PHOTOGRAPHY: EQUIPMENT TIPS FOR MOUNTAIN ENTHUSIASTS
MOUNTAIN PHOTOGRAPHY: EQUIPMENT TIPS FOR MOUNTAIN ENTHUSIASTS
“What kind of equipment do you use for your mountain photos?” The question which usually follows “Which camera do you use?”. Mountain photography equipment is not complicated, nor does it require a large arsenal of special products.
In this article, we have summarized what we believe to be the most useful equipment for mountain photography. We also tell you what you can leave at home, what you don’t have to buy in the first place, and why a mountain emergency plan makes sense for mountain photographers as well.
Mountain photography equipment tips
Summary
- A camera with 2 interchangeable lenses (as light as possible, as heavy as necessary)
- spare charged battery and empty memory card
- Suitable mountain sports backpack – approx. 20-40L
- Suitable mountain boots
- Clothing adapted to the weather
- A sound risk management or contingency plan
Mountain sports backpack
Most of the mountain tours in the Alps are day tours, sometimes you stay overnight in a hut or bivouac. For these adventures you need a halfway decent backpack.
Important criteria:
- Fit/Stop: Especially for biking and skiing, but also for hiking, a good mountain backpack is characterized by a good fit and a good stop. A rucksack with very good support during movements usually limits ventilation. Here you have to decide whether you need this and accept a quickly sweaty back.
- Size/storage space: For day trips a 20-30L backpack is usually sufficient. For hut or bivouac overnight stays 30-40L are recommended.
We have tested special photo backpacks, also special photo backpacks for outdoor sports and have found that there is no need for them. Sure, it is great to have a very well protected cover, large compartments with quick access. We have never really needed it. Most of the time we put the camera and lenses into a supplied or normal camera bag and then into a normal outdoor or mountain sports backpack.
Most inexperienced mountain hikers pack their rucksack far too full with things they don’t need. A 40L backpack with a few good attachments is usually sufficient for a 3-day tour, even in high alpine terrain.
Outdoor camera bag? The beenie tactic
Most often we do without special camera bags on the mountain altogether. Almost always the use of a classic Beenie is enough for us:
Place the camera in a normal winter beanie, the interchangeable lens as well, eh voila. We find it practical to create more space for other needful things and its also great to have less stuff lying around to worry about. It’s also a plus to have some extra pleasantly warm headgear for the summit where most of our pictures are taken anyway.
Mountain photography: camera and lenses
As light and as little as possible, as big as necessary.
For professional reasons, we photograph with a full format camera – still the lightest DSLR, the Nikon D610. If you don’t need to deliver professional results, smaller models will do.
We have described the best camera for mountain photos more comprehensively on one of our other blogs here.
Mirrorless or classic camera with mirror?
At the moment we find the mirrorless cameras even better for photography. Mirrorless cameras often save about 100 grams of weight, but lose it again, because in most cases you can take much less pictures with one battery and therefore you are forced to carry 1-2-4 spare batteries. An extra added benifit of using mirrorless cameras is the benefit of taking 4k video and on some models up to 120fps in full HD.
Which lenses for mountain photography?
Of course fixed focal lengths are optically often the best models, sometimes they are sufficient, but since we have to save weight and space there are usually 2 standard zoom models.
Our go to’s are a 18-50mm and a 70-200mm lens. For mountain photography we prefer a lens with aperture 4 and without stabilizer. The standard 15-50mm can also be aperture 2.8. the benefit of wider aperture and stabilisation is diminished by the extra weight and hardly brings anything on the mountain.
Additional equipment (tripod, filter…)
We usually do without additional equipment completely. Sure, a charged battery has to be in the backpack, on multi-day tours a spare battery comes along. In addition we usually have a spare memory card with us. That’s it.
For certain tours or if we want to do special night photography (e.g. the milky way), we only take a tripod with us and sometimes special equipment for e.g. milky way panoramas. But this happens only very rarely. Usually it is better to just leave the equipment.
Do I not need filters?
Yes and no. We practically never use filters on the mountain.
A UV-filter is not necessary anyway, a polarizing filter may be useful for reflections, but to get contrast e.g. in the sky, image editing is sufficient – we have to do this at home, but save the space in our backpack for several hours at the back.
Sometimes we have gray filters and gray gradient filters with us – when we know that a particularly intense or shapely sunrise or sunset is to be expected.
Most of the time, however, we also leave them in the valley. A good camera nowadays has such a high dynamic range that this is usually no longer necessary. And if it does, there are certainly enough image compositions that can be used without gray filters or gradient filters. We usually use a gray filter and gray gradient filter only for landscape photography, when we don’t have to carry the equipment on our back for hours or days.
Further equipment for mountain photography
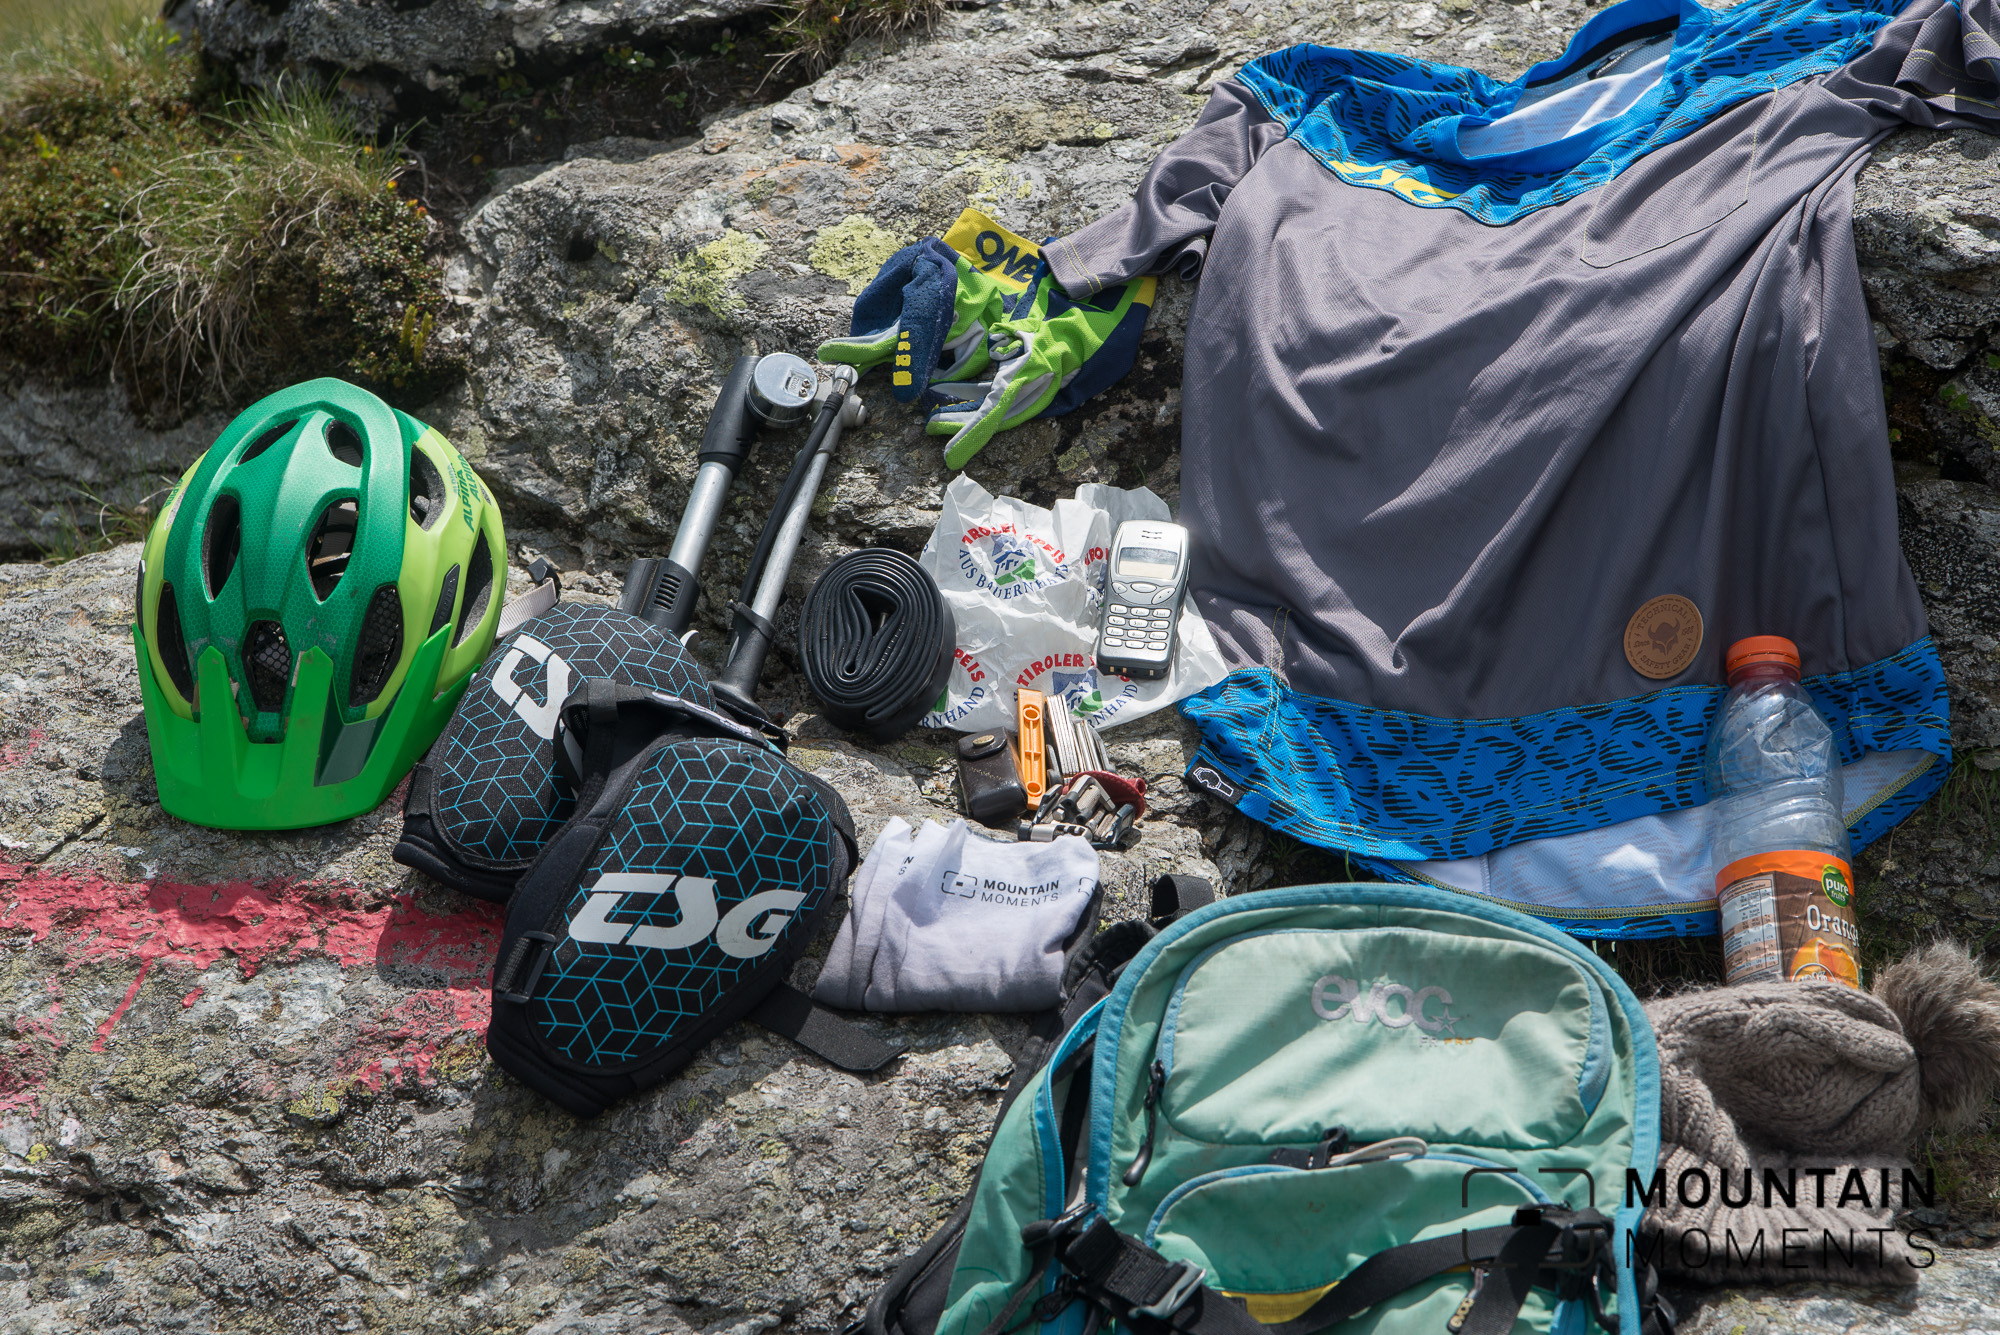
The other non photography gear is much more important when it comes to mountain photography. Well-fitting shoes with a decent profile are probably the most important, in addition to weatherproof and adapted clothing.
To take exactly what you need with you and not too much is a high art gained through experience. We almost always bring a thin rain jacket with us for emergencies as well as a comfortable fleece sweater, thick warm jacket and second pair of trousers.
Safety equipment
Enjoying the mountain is one thing, but sensible safety equipment and a minimal safety net should always be planned in advance.
A (charged) emergency cell phone is always with you, as well as a small first aid kit and of course a map (usually digital on your smartphone) or a very good knowledge of the area. In addition, someone else should always know (principle of the external tour partner) which tour you are about to go on, on which mountain, over which route and how the rough time planning is. This way you have at least a small chance to put a spoke in the wheel of the Grim Reaper in an extreme emergency.
For classic hut tours, you normally also tell the host of the hut or sign the hut book. Despite all modern digital technology, these are still the best risk management strategies for mountain emergencies.
Further insights into mountain and landscape photography can be learned on one of our photo workshops. Feel free to send us any questions you may have through our contacts page on our website.
Need tips for better mountain pictures? Here we have a comprehensive mountain photography tutorial, which should give you a lot of ideas and help. If not, just contact us!

Hi, i am Marius, i love exploring the mountains and nature. Friends say, i know the mountains better than most locals, but actually i get lost all the time while photographing ;). Read more about the Mountain Moments Team.


Leave a Reply
Want to join the discussion?Feel free to contribute!